
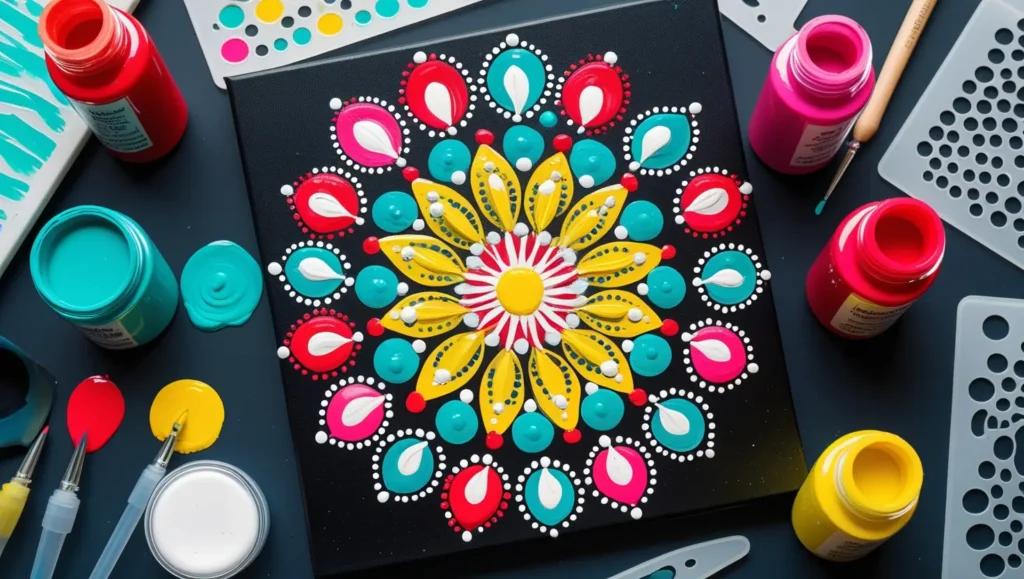
Ever looked at a hypnotic circle made of perfect little dots and wondered what is dot mandala art? Think of it as painting by rhythm: tiny, intentional dots building out from the center to create balanced, meditative designs. It’s beginner-friendly, incredibly relaxing, and wildly versatile—from canvases and stones to pots and ornaments. If you’re asking what is dot mandala art and whether you can do it at home—the answer is absolutely yes.
🎯 Why People Love It
- Meditative flow: the repetitive dotting melts stress.
- Beginner-friendly: no drawing skills required.
- Decor-ready: gorgeous on rocks, canvases, pots, jars—anything with a surface.
By the time you finish this guide, what is dot mandala art won’t be a question—it’ll be your new go-to creative reset.
🧰 Tools You’ll Need
- Acrylic paints (basic set is fine)
- Dotting tools (or the back of brushes, pencils, toothpicks)
- Surface (canvas, stone, wood slice, pot)
- Optional stencil (for perfect symmetry)
- Paper towel + palette or small cups
🧪 Perfect Paint Consistency (Two Proven Methods)
For crisp, domed dots that don’t slump or spike, you want paint like yoghurt (thick, creamy, smooth). Here are two reliable ways to prep acrylics, the pro way.
1) Liquitex Method (Additives & Mediums)
Goal: improve flow without breaking the acrylic binder.
- Flow Aid (for smoother flow, not watery paint):
- Pre-dilute Flow Aid: mix 1 part Flow Aid : 20 parts water (distilled is best).
- Add up to 25% of this diluted mix to your paint and stir slowly to avoid bubbles.
- Test a dot; adjust with a drop more diluted Flow Aid if needed.
- Pouring Medium (to level and reduce peaks): Add a small amount of Liquitex Pouring Medium to heavy or soft body acrylics until dots land smooth and slightly domed. (Liquitex’s pouring guidance for fluid work starts around ~5% paint : 95% medium—great for pours; for dotting, use far less so your paint stays body-rich.) Stir gently; let bubbles dissipate before dotting.
- Gloss/Fluid Medium (thin without weakening): Prefer a simple mixer? Use Liquitex Gloss Medium or Basics Gloss Fluid Medium to thin and extend paint while keeping the film strong. Add a little at a time; stop when the paint drops cleanly from your tool and forms a smooth dome.
Pro note: Water alone can over-thin acrylics and weaken adhesion. Mediums keep the binder intact.
🧭 Layout & Symmetry (With or Without a Stencil)
Using a stencil
- Place the stencil on your surface and lightly trace guides (rings/spokes).
- Remove it and follow those guides with dots—center outwards, tool sizes from large to small for natural taper.
“Mandala stencils for dot painting” help beginners get clean symmetry fast. They’re fantastic training wheels while you build muscle memory.
Freehand (no stencil)
- Draw a circle. Mark a plus (+), then an X (now 8 sections).
- Keep dividing until you have 16 or 32 guides.
- Start at the center, add a large dot, then concentric rings. Alternate colors/sizes for rhythm.
🎨 Color Prep Tips That Matter
- Test swatches: make 5–6 practice dots on scrap—watch for slumping (too thin) or peaks (too thick).
- Wipe tools often for consistent dot size.
- Contrast wins: dark background + bright dots = instant pop.
- Batch colors into mini cups so you can dot without stopping.
🧩 Quick Start Project (15 Minutes)
- Paint a small rock or coaster black; let dry.
- Large white center dot.
- Ring of medium turquoise dots.
- Ring of small gold dots between turquoise.
- Add accent micro-dots with a toothpick to “sparkle” the ring.
That’s it—frame-worthy in under half an hour.
✅ Takeaway
You don’t need to be a painter to start—just the right consistency and a plan. Prep your acrylics with Flow Aid + Medium (or a simple medium-first, water-last tweak), use a stencil for instant symmetry, and build your mandala dot by dot. Calming, clickable, and gorgeous—exactly the kind of project your readers (and Pinterest) love.