

🎨 Why Draw a Turkey for Thanksgiving?
Thanksgiving is all about warmth, creativity, and gratitude — and what better way to express it than with art? Learning how to draw turkey step by step is a fun way to decorate cards, posters, or even plan your next painting project. Whether you’re drawing with kids or sketching for your art journal, this is an easy, relaxing idea to try today.
✏️ What You’ll Need
- Pencil and eraser
- Black fineliner or marker
- Colored pencils, markers, or acrylic paints
- A sheet of paper (or digital canvas if you draw on tablet)
💡 Tip: You can also trace your hand to create a hand turkey — a fun version if you’re looking for how to draw turkey with hand ideas.
🦃 How to Draw Turkey Step by Step
Let’s make it super simple and beginner-friendly. Each step adds a small part — don’t worry about perfection, just enjoy the process!
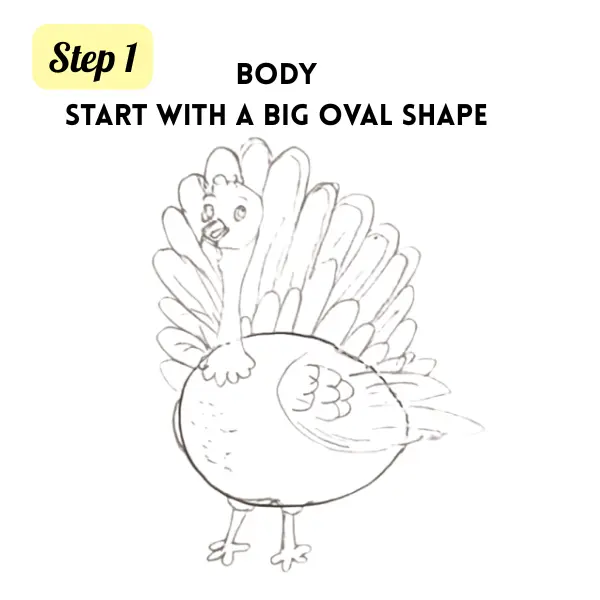
Step 1: Draw the Body
Start with a big oval shape in the center of your paper. This will be your turkey’s body. Keep it slightly tilted for a natural look.
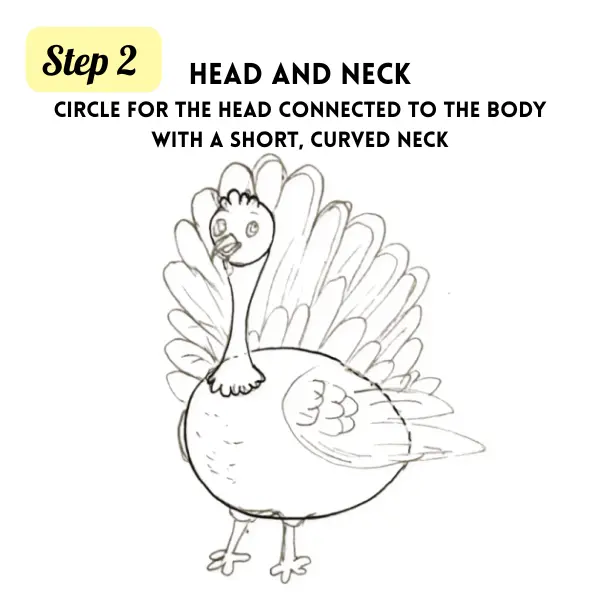
Step 2: Add the Head and Neck
Draw a small circle for the head connected to the body with a short curved neck. Make sure the neck overlaps the oval a bit.
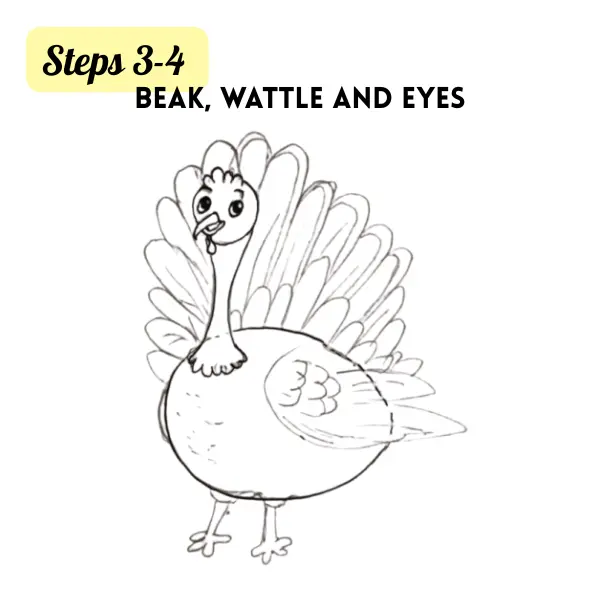
Step 3: Sketch the Beak and Wattle
Draw a small triangle for the beak and a soft squiggly line below it for the wattle (the red part under the beak).
🖌 Pro tip: If you plan to paint this later, outline it lightly with pencil first.
Step 4: Create the Eyes
Add two round eyes above the beak — one slightly larger for a cute cartoon look. Fill them with black and leave a white sparkle spot.
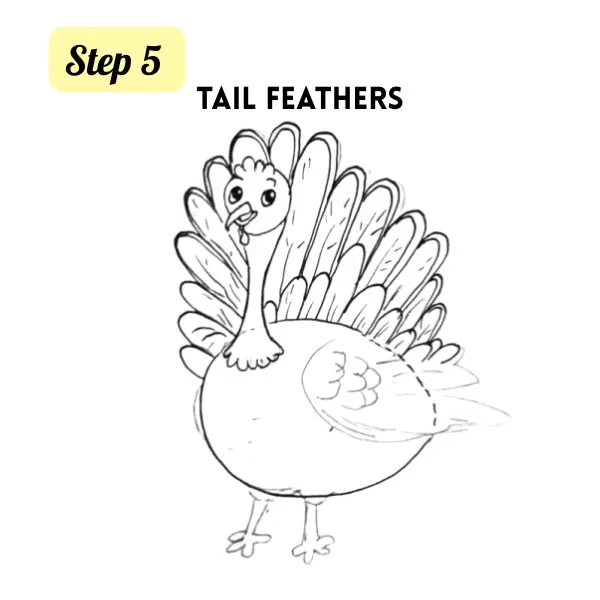
Step 5: Draw the Tail Feathers
This is the fun part! Draw several long, curved feathers fanning out behind the turkey’s body. You can make 5–7 feathers for balance.
Alternate sizes and directions to make it lively and natural.
🪶 Color idea: Use warm fall shades — orange, yellow, red, and brown — for a beautiful Thanksgiving palette.
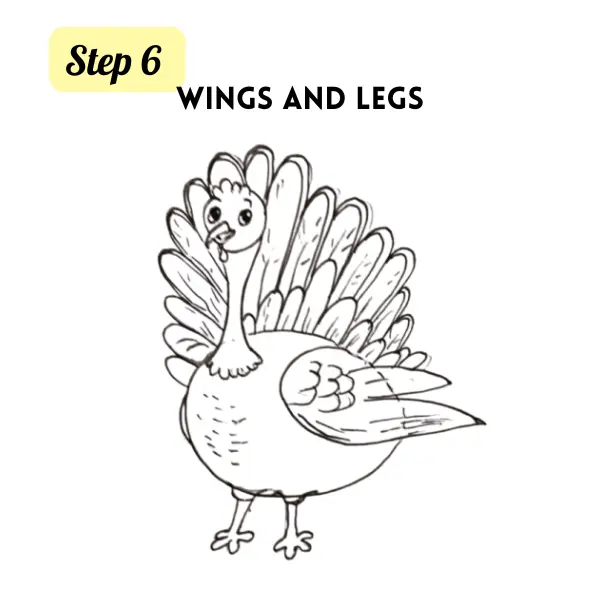
Step 6: Add the Wings and Legs
Draw one visible wing on the side with a few curved lines for feathers. Then add two stick-like legs ending in three toes each.
💡 Tip: For how to draw turkey easy, you can skip some feather details and just color simple shapes.
Step 7: Outline and Color
Trace your pencil lines with a black fineliner or thin marker. Once it’s dry, erase the pencil marks.
Then color your turkey with crayons, markers, or paints. If you’re an acrylic painter, go ahead and paint directly on a mini canvas for a festive piece!
🖍 Bonus: How to Draw Turkey with Hand
- Place your hand flat on the paper and trace around it.
- The thumb becomes the turkey’s head and neck.
- Each finger becomes a tail feather.
- Add an eye, beak, and wattle on the thumb area.
- Color and decorate with your favorite fall shades!
This version is super fun for kids and quick Thanksgiving crafts.
🌻 More Thanksgiving Drawing Ideas
If you enjoyed this, you’ll love our post on 👉 Thanksgiving Doodles Ideas — it’s full of cute sketch ideas and art inspiration for your next project.
🌐 Helpful External Resource
Check out this simple tutorial from Art for Kids Hub — they have easy drawing guides for all ages and fun Thanksgiving art ideas too.
🎨 Final Thoughts
Now you know how to draw turkey step by step in the easiest way possible!
You can use your drawing to create greeting cards, coloring pages, or even paint it on canvas with acrylics. Add a few fall leaves or pumpkins around your turkey for a cozy Thanksgiving scene. 🍂🦃